2. Installing the harness tubesThis is the scary part - be careful here.
|
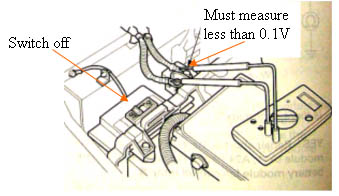
Make sure that the main HV switch is turned off
Also make sure that the 12V battery in front, has been disconnected on the negative side. |
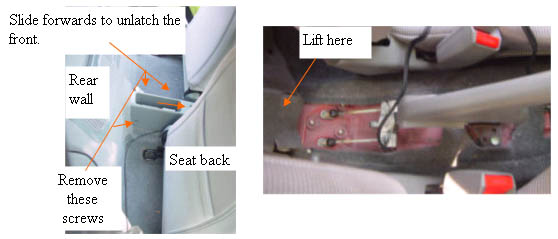
Remove the cover of the emergency brake.
Once the e-brake cover is removed, lift the rear wall rug to expose the square hole in the rear wall. |
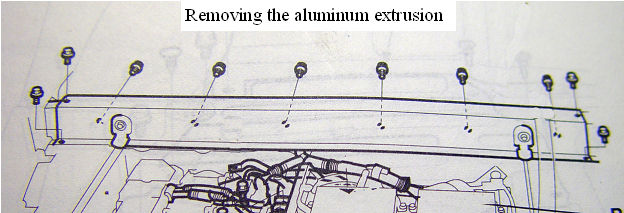
Removing the aluminum extrusion behind the seats
|  | | | Gaining some access to the harness path |
The harness must pass through a tight area behind the seats as it runs to the e-brake area. We will remove the large aluminum extrusion by removing the mounting screws under the carpet. The drawing shows the screw locations. |
Wiring tubes
| 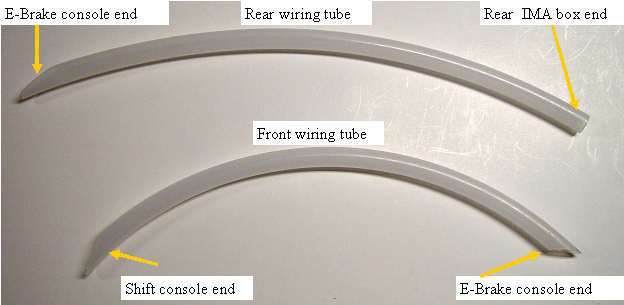 | | | Wiring tubes |
To make the installation/removal of the harness easier, and to offer more protection for the wires, I am including two wiring tubes.The tubes can be left in place if the harness needs to be removed, to aid in the re-installation. |
Install rear wiring tube
| 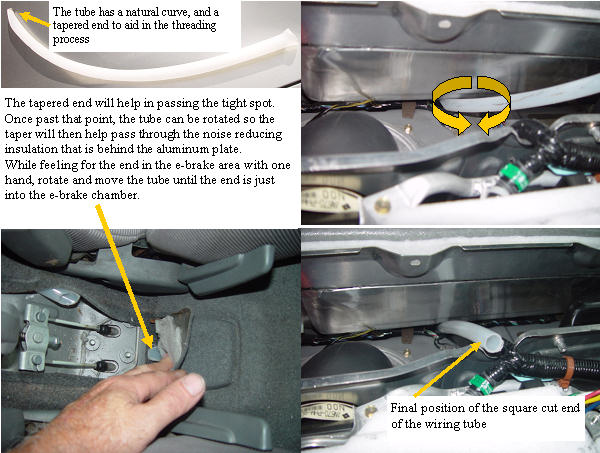 | | | Getting the rear tube in place |
The stiffness and tapered ends make the wiring tube much easier to thread than the bare harness would, as well as protecting the harness from abrasion. |
Threading the front wiring tube
| 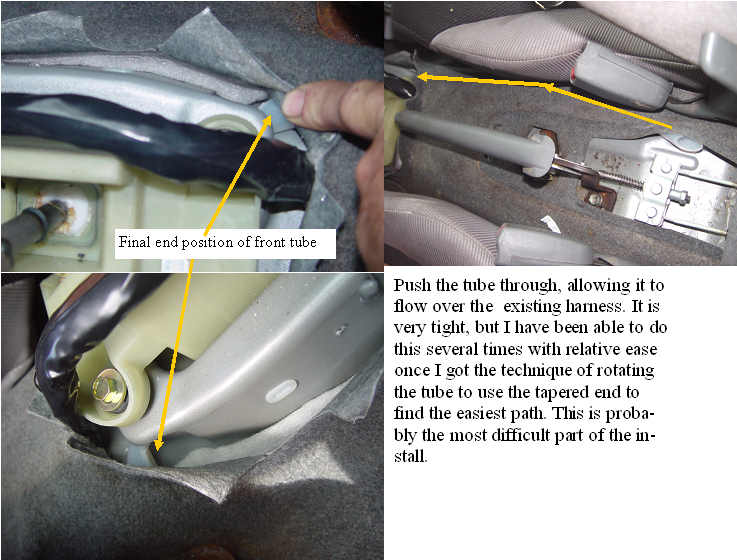 | | | Front wiring tube install |
The rear tube is pretty easy compared to the front tube. The rug is tightly held in place with the mounting bolts of both seats, but can be slightly stretched with the tube.If you take out the passenger seat it makes the tube threading much easier. The main stock harness from the IMA to the front of the car also passes through this same area, and the MIMA wiring tube must pass over it, but under the noise canceling material. When the tube is correctly positioned, the tapered ends will be as shown in the photos. |
Installation and introduction: |