|
Installing MIMA with the pin replacement harness
|
 | |
|
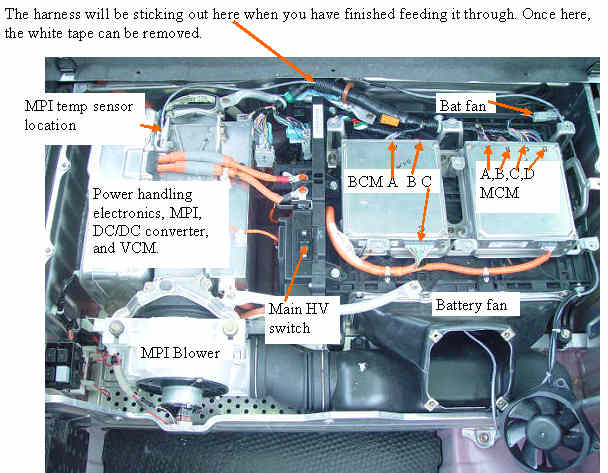
Connector locations
|
This set of instructions is for MIMA systems #28 to system # 58
The pin replacement plug in MIMA installation is easier than the original cut and splice system that was used on the first 30 systems. The new harness is plugged into the existing connectors a pin at a time. The old pin is removed with tools that I provide, and the MIMA harness pin adapter is inserted in the connector in it's place. In most cases the old pin/stock harness wire is just plugged into the MIMA adapter pin and that connection is done.
To remove the system, is just a matter of removing the adapter pin and plugging the stock pin back in.
The video has grown to 1.6G, or 1:45. Besides the install video, it includes operation and testing, as well as on the road video of MIMA on demand, MIMA active, ABC, and PIMA in action, as well as calibrate and option selections.
I will be sending a DVD with a WMV file format of the instructions to recent MIMA buyers that have requested one. It is crude and rude, and can get long here and there, but I have presented a lot of helpful information that can make your MIMA experience a better one.
I will produce a better one when I get some time.
Mike
|
|
|

