|
Installing MIMA with The Plug and Play harness
|
 | |
|
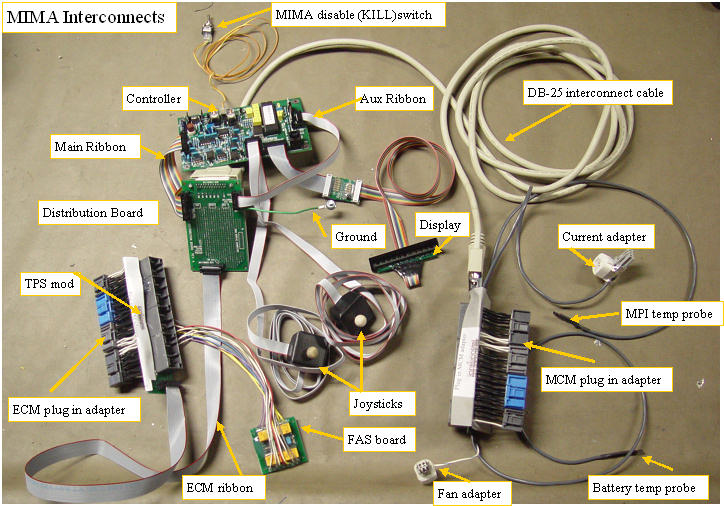
MIMA interconnects
|
Dec 16 2008
The 29 systems that have been ordered and paid for have been shipped.
I have two more orders that I will be testing in the next day or so
All of the shipped systems have full install instructions included on the new plug and play video, which you should watch before attempting to do the install. I hurried to put together the video so a few things were overlooked or not explained well enough.
The web based instructions will try to serve two purposes. One being a complete printable version of the instructions that you can bring to the car. Second, a place where I can go into more detail on the sections of the video that were weak.
These instructions will refer to the latest and easiest to install MIMA harness.
This hand built harness is composed of several circuit boards and interconnect cables that allow MIMA to be plugged in and removed quickly, and do it in a mechanically and electrically sound way as to not interfere with the cars signals.
All of the signals between the ECM and its harness, and the MCM and it's harness pass through the two MIMA plug in adapters. If any wires were crossed, it could easily damage the controllers.
I personally test each plug in adapter input to confirm that it goes to the correct output and for shorts to other wires.
All of the MIMA connections are made on the ECM, Distribution, and MCM cards.
I also test the complete MIMA part of the harness to confirm that those lines are correctly connected.
I test each cable or ribbon, both separately and fully connected with the other boards and harnesses.
With this degree of testing, as long as you make sure that the connectors are plugged in fully, and the ribbon cables are not strained at the ends, or pinched between metal, there is no need for any further testing on your end, just plug in the adapters gently run the ribbons and DB-25 cables, and when it is all plugged in, You should be ready to roll with no issues. If something unexpected happens, call me, and I will work with you to resolve the problem.
As a last feature, I bring the extra conductors in the ECM ribbon and the MCM DB-25 cable to the distribution card, so any signal on either card can be sent to the distribution card.
This card has a breadboard area right where we have access to all the cars signals, as well as the MIMA signals, so it can be the basis of a much expanded computer interface to the car, while remaining a plug and play system.LCD displays, Data loggers, PC interface, bluetooth, are only a few of the possibilities.
|
|
|

