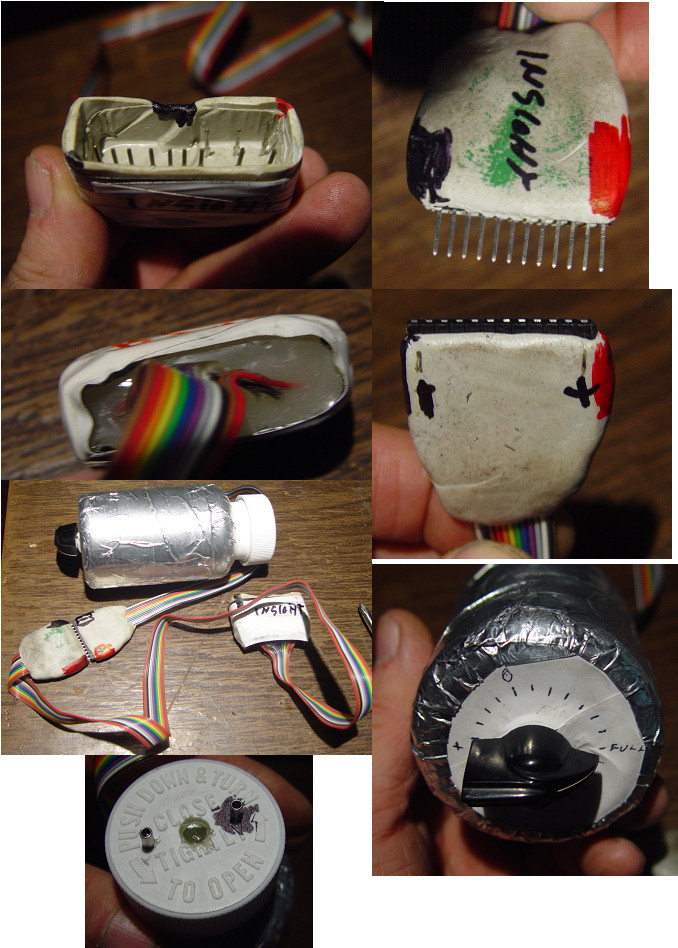
Quick way to make a connector for checking the subpacks
|
 | |
|
Battery tap rotary switchvoltage tap reader
|
After several hours of trying to find the BCM connector that is the mate for the battery tap harness connector,I gave up.
Using a pack that had no cells,so the connector would not have power.
I took a small clear plastic bag, and carefully taped the cut up bag over the harness connector,and secured it with black tape near the base, where the wires come out.
Next I inserted the pins pulled from one of the 104Pin headers used in the MIMA plug and play adapter, through the plastic into the harness connector female pins.
Making sure that the pins were inserted fully,I covered the plastic covered connector with epoxy putty, allowing the pins to stick through the epoxy.
I taped the epoxy with black tape to hold the shape.
When the epoxy cured,I soldered a ribbon cable to the pins, making the order of the ribbon follow the taps from the - end to the HV + end in sequence.
An aluminum duct tape dam that was adhered to the epoxy, made a cavity on the rear where the ribbon attached to the pins.The cavity was filled with hot melt, casting the wires and pins in place.
I put a 12 pin .1" OC straight male header on the other end of the ribbon.
The voltage taps can be read here, or I can plug in another female 12 Pin header, also attached to a ribbon, into a pill bottle(it was handy).
I mounted a 20 position break before make dual pole rotary switch on the base of the pill bottle, and two terminals on the cap for the volt meter.
I also made the conector for a civic pack, that plugs into the same female header on the rotary switch /pill bottle, so the same switch can do either.
To use it, one unplugs the voltage tap connector from the pack, and attached a voltmeter to the two pill cap terminals, and I can monitor each 12 cell stick , in sequence, as well as the whole pack voltage.
It took less time to build than I spent looking for the connector, and It can do both a civic and insight.
The connector plugs in reliably and securely, after the plastic is removed.
Not pretty, but it works well and is pretty rugged and safe.
|
|
