| 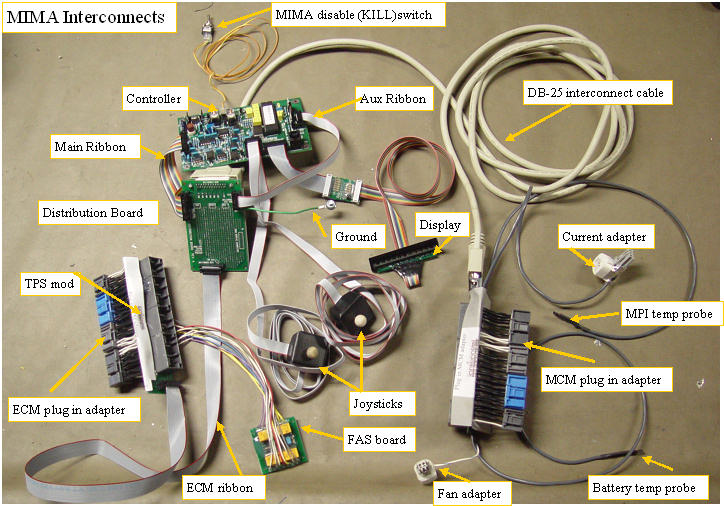 | | | MIMA interconnects |
The MIMA system is unique in the world,It gives the driver full control of the IMA motor for both charging and assist at the drivers discretion.
The new install technique was designed to make the system as plug and play as possible in that could be removed if necessary in only a few hours.
The following instructions will continue to be tweaked over the next few weeks as I continue to get feedback from the people installing systems, but are good to go right now.
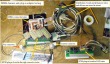
The new install uses custom made adapters that fit between the MCM and ECM and their associated harness plugs.
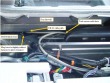
The most time consuming aspect of the install is the removal of the IMA and ECM covers, passenger seat, and reassembly of those components once the adapters are plugged in.
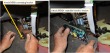
The most delicate/difficult aspect of the install is the freeing up of the three small bundles of wires in the ECM harness, and the dressing of the wires and harness when reinstalling the ECM covers.
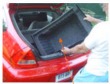
While none of the connections are made to the High Voltage Battery or power wires, we will be working on the rear section of the car where those wires are present, and exposed. I would strongly recommend that you do not attempt to install MIMA if you do not have the required skills to do it correctly and with confidence. The car can be damaged, the MIMA circuits can be damaged, you could be electrocuted, or burned. This is not a car stereo install, it goes much further. I am attempting to provide thorough step by step instructions, with many photos to guide both the novice and professional through this installation, And will continue to refine them as I receive feedback from the people doing the first installs.
|