The end of the Plug and Play MIMA, and MIMA2
MIMA introduction
MIMA Operation
MIMA Users Page
Installing MIMA with The Plug and Play harness
FAQ
Installing MIMA with the pin replacement harness
software
The MIMA Joystick
The MIMA Display
The FAS system
DIY MIMA L
Cable impedance problem with last MIMA systems.
Learning to drive with MIMA
Hardwired Harness
Level 1 Installation
2. Disassembly
3. Thread the Harness
Make sure that the main switch is turned off
Remove the cover of the emergency brake.
Feed the wire fish
Finish threading
4. Threading the Harness, Cont'
5. Opening the Harness
6. Level 1 Install (rear connections)
7. Fan Diodes Install
8. Battery Amp Monitor Rear Connections
9. Mounting the MIMA system in the car.
10. Level One wiring test.
11. Level 1 Check first power up
12. The first MIMA operational test
13. Testing the fan control wiring
14. Confirming temp probe and fan control operation
Level 2 install
Theory of Operation

3. Thread the Harness

3. Thread the Harness
This is the scary part - be careful here.

Make sure that the main switch is turned off
Remove the cover of the emergency brake.
Once the e-brake cover is removed, lift the rear wall rug to expose the square hole in the rear wall.
Feed the wire fish
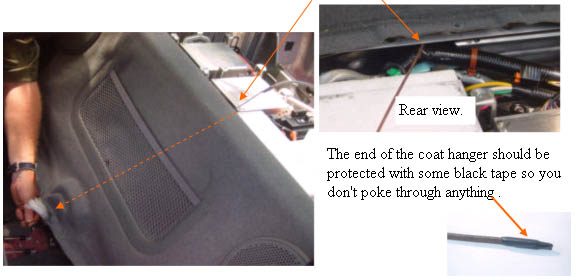
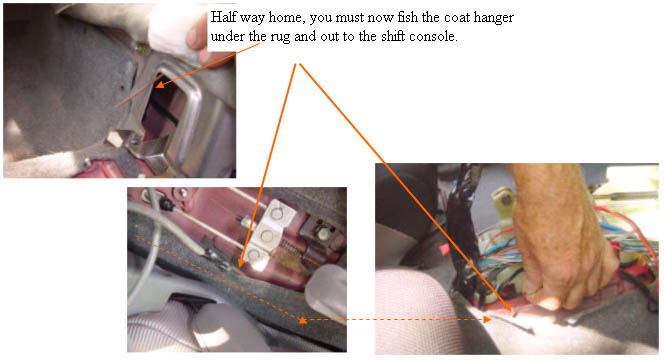
Feed the end of the wire fish in and down, while watching for an opportunity to grab it in the square hole at the rear of the e-brake area.

The end of the wire fish should be protected with some black tape so you don't poke through anything.
Finish threading
Level 1 Installation:
2. Disassembly
3. Thread the Harness
4. Threading the Harness, Cont'
5. Opening the Harness
6. Level 1 Install (rear connections)
7. Fan Diodes Install
8. Battery Amp Monitor Rear Connections
9. Mounting the MIMA system in the car.
10. Level One wiring test.
11. Level 1 Check first power up
12. The first MIMA operational test
13. Testing the fan control wiring
14. Confirming temp probe and fan control operation