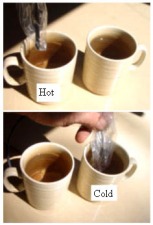
14. Confirming temp probe and fan control operationWe will need some props for this test.
1. Cup of cold water
2. One cup of hot water
3. One small sandwich bag (no holes)
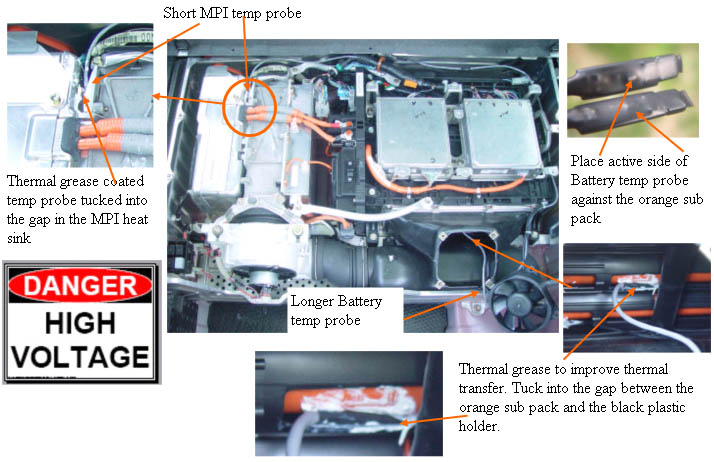
Start the car and let it idle in neutral with the e-brake on. Place the plastic bag corner over the shorter MPI temp probe, and sink it down into the hot water. (water should be over 110 degrees)
Within a short time after the probe has been submerged, the fans should come on.
Once that happens, remove the probe, and sink it into the cold water. The fan should stop running in a few seconds. Repeat this sequence with the Battery fan probe.
If everything is working to this point, you can proceed to installing the temp probes.
The white ground wire at the front of the harness must be connected to chassis ground or the fasn test will fail.(no ground)
|
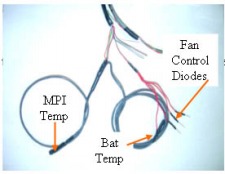
Placing the temp probes and fan diodes
The rear MIMA harness splits into two smaller cables that have the two temperature probes on their ends, as well as 4 wires with diodes connecting to the red/black wire of the cable.
The four diodes are already tied into the harness, so all we need to do is install the probes in the correct locations, using the white thermal grease to optimize heat conduction to the probe.
|
Careful!
Turn off the main battery switch, and perform the voltage is save test before proceeding.
Although the main switch is turned off, care must be exercised not to touch any exposed metal in the battery enclosure. Use one hand, and don't touch the car chassis.
|
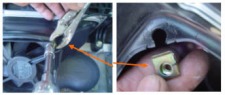
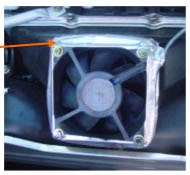
Remove the battery cooling fan
Remove the battery cooling fan. The spring clips and screws are pretty tight, and since the plastic outer cover is only thin plastic, you will damage the case if you do not grab the spring clip with pliers or vice grips while loosening the screws
|
Thermal grease
Thermal grease to improve thermal transfer. Tuck into the gap between the orange sub pack and the black plastic holder.
|
Improve the fan
Get some aluminum duct tape, and seal the perimeter of the fan, so no air is sucked in there.
|
Complete...
All test for level 1 install are now complete. Re assemble the rear harness, and make it look like this.
The battery temp probe wire should be zip tied to the existing fan power wire, so it cannot flop around. The harness zip ties should be clipped into the car chassis to support that harness as it originally was.
Put everything back together, install the rear electronics covers. Turn on the main switch, and put the storage insert and rugs back in , and level one is nearly complete
|
Level 1 Installation: |