The end of the Plug and Play MIMA, and MIMA2
MIMA introduction
MIMA Operation
MIMA Users Page
Installing MIMA with The Plug and Play harness
FAQ
Installing MIMA with the pin replacement harness
Installation and introduction
1. Disassembly
2. Installing the harness tubes
3. Threading the Harness
Getting the harness ready to thread through
Threading the harness through the tubes
Cover the work area
Comfortable position
Unwraping the white tape
4. Removing the pins from the Multilock connectors
5. Installing the rear connections
6. Mounting the MIMA system in the car.
7. Accessing and connecting to the ECM
8. Overall wiring test
9. First power up test
10. The first MIMA operational test
11. Confirming temp probe and fan control operation, and final checkout
12. Mounting the low profile display
13. Removing the MIMA harness
software
The MIMA Joystick
The MIMA Display
The FAS system
DIY MIMA L
Cable impedance problem with last MIMA systems.
Learning to drive with MIMA
Hardwired Harness
Theory of Operation

Getting the harness ready to thread through

Getting the harness ready to thread through
Ready to thread through the tubes

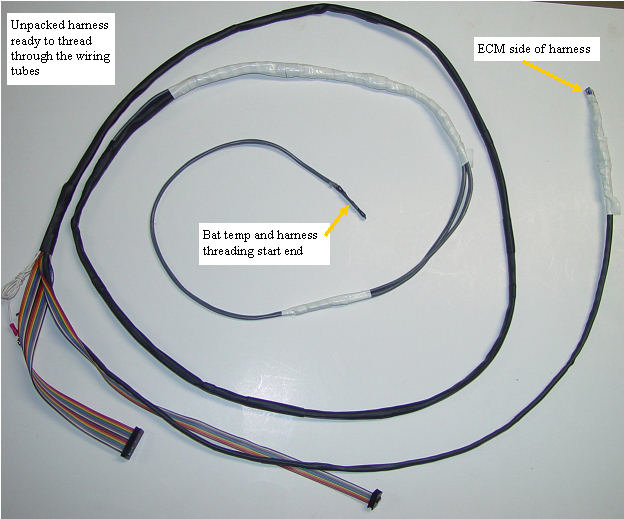
The shipping tape has been removed, and we have the wiring tubes in place. The white taped areas are holding the plug in pins and adapters tightly against the harness proper, so that the diameter will fit through the wiring tubes. Start with the temperature probe end and carefully thread the harness through both wiring tubes.