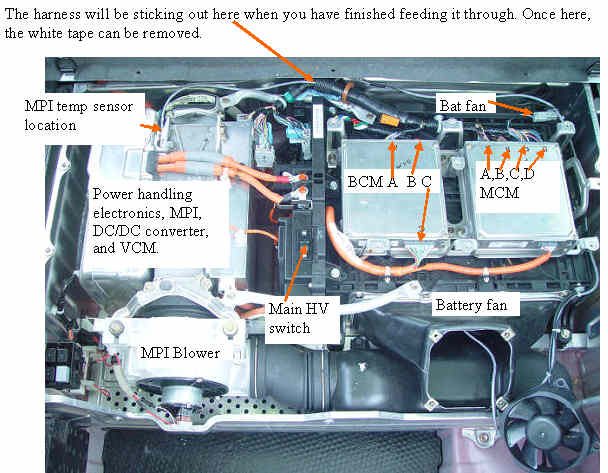
Finishing Threading Through
The temp probes and the harness in general is fairly rugged, but the tight areas that the harness must be fished through, and the lumpy nature of the harness, make it extremely important that you do not try to just pull the harness through the rug and rear fire wall.
You must only pull the wire fish enough to guide the cables' leading end through, as you push the cables in from the shift console end. The carpet can be raised with a long screwdriver during the fishing operation to minimize the strain on the connections. Go easy and you will not have a problem.
|
|