The end of the Plug and Play MIMA, and MIMA2
MIMA introduction
MIMA Operation
MIMA Users Page
Installing MIMA with The Plug and Play harness
Installation and introduction
1. Disassembly
2. Gaining access to the opening behind the seats
3. Threading the DB-25 to the front
4. Installing the rear connections
5. Mounting the MIMA system in the car.
6. Accessing and connecting to the ECM
Getting the ECM separated from the bracket
Modifing the bracket to allow room for the plug in adapter
Removing the ECM breakout tape
Attaching the ECM plug in adapter
routing the ECM ribbon to the distribution board
7. Installing the MIMA joysticks
8. Mounting the display
9. First powerup
10. The first MIMA operational test
Installing MIMA in a RHD Insight
FAQ
Installing MIMA with the pin replacement harness
software
The MIMA Joystick
The MIMA Display
The FAS system
DIY MIMA L
Cable impedance problem with last MIMA systems.
Learning to drive with MIMA
Hardwired Harness
Theory of Operation

routing the ECM ribbon to the distribution board

routing the ECM ribbon to the distribution board
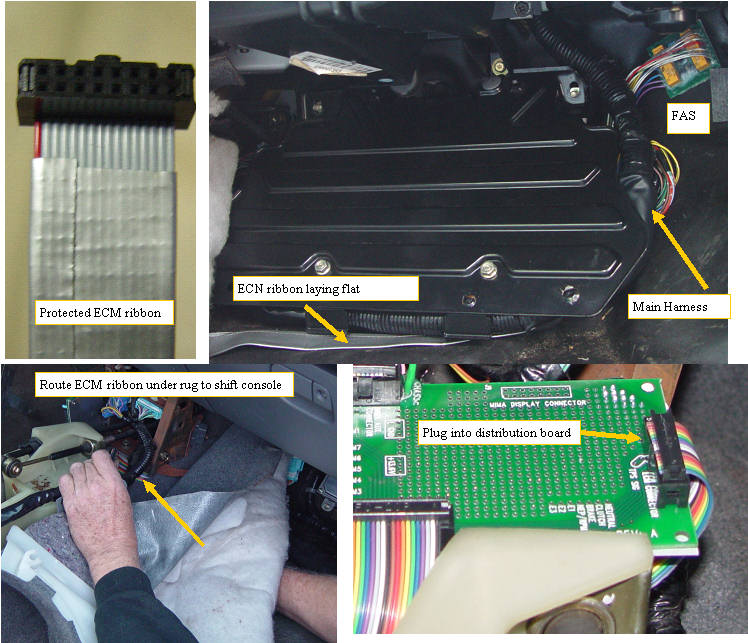
Routing the ECM ribbons

The ECM Plug in adapter is connected to the MIMA distribution board with a 16 conductor ribbon. Because the ribbon is in contact with the rug and floor pan, we covered the ribbon with duct tape to give the ribbon more abrasion protection. The rug is lifted, and the ribbon is gently routed to the rug cutout in the front of the shift console, under the distribution board. The ribbon wants to sit flat on the floor pan and as it passes up the the shift console. The ECM side will be plugged into the 16 pin header on the ECM plug in board, and the other end to the ECM header on the right of the distribution board. Once this is connected and the wires dressed, the rug can be placed back in position.