Modifing the bracket to allow room for the plug in adapter
|
 | |
|
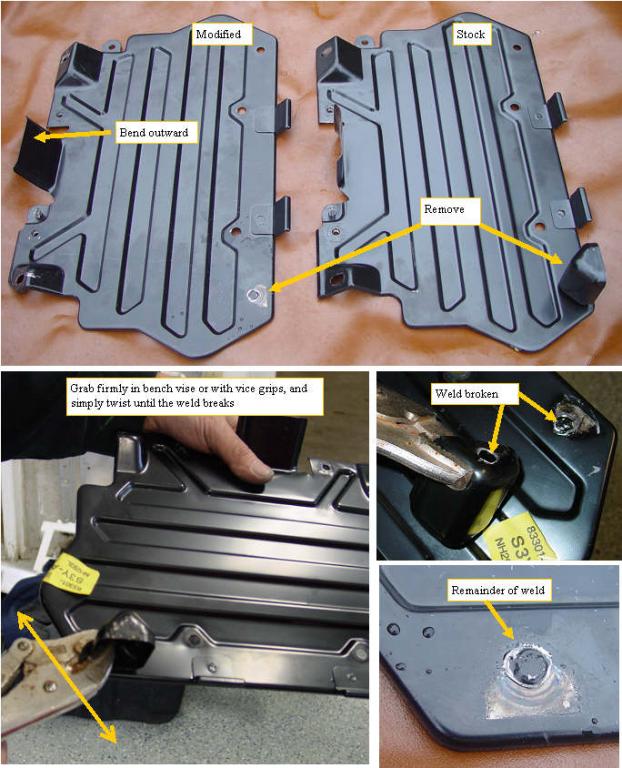
Modifing the ECM cover
|
The ECM computer and the wiring harness is tucked under the black metal cover. The harness is held under the cover by a stamped metal piece on the lower right corner.
The plug in adapter was made as small as possible, but with it installed, the main ECM harness must be moved out about 1.5 inches, which would put it right under the stamped metal piece. Another issue is that the ECM is screwed to the cover from underneath, which means that one cannot neatly position the harness/plug in adapter/FAS with the ECM in the mounting position, which is the best way to assure that the harness and adapter are properly positioned.
I determined that two small modifications to this plate solves all of the problems.
The first is to put the stamped metal piece in a vice, or grasp with vice grips, and to rotate the plate by hand. This will rip out the spot weld that attaches the stamped piece, and open up this restriction.
The second modification involves simply bending the metal tab that sits over the ECM top slightly outward to allow the cover to be passed over the ECM in its final mounting position.
A bench vise will be the easiest as it will more firmly grab the tab that must be removed.
The modified cover will be as strong and offer the same protection to the ECM as the stock cover.
|
|
