The end of the Plug and Play MIMA, and MIMA2
MIMA introduction
MIMA Operation
MIMA Users Page
Installing MIMA with The Plug and Play harness
Installation and introduction
1. Disassembly
2. Gaining access to the opening behind the seats
3. Threading the DB-25 to the front
4. Installing the rear connections
5. Mounting the MIMA system in the car.
6. Accessing and connecting to the ECM
Getting the ECM separated from the bracket
Modifing the bracket to allow room for the plug in adapter
Removing the ECM breakout tape
Attaching the ECM plug in adapter
routing the ECM ribbon to the distribution board
7. Installing the MIMA joysticks
8. Mounting the display
9. First powerup
10. The first MIMA operational test
Installing MIMA in a RHD Insight
FAQ
Installing MIMA with the pin replacement harness
software
The MIMA Joystick
The MIMA Display
The FAS system
DIY MIMA L
Cable impedance problem with last MIMA systems.
Learning to drive with MIMA
Hardwired Harness
Theory of Operation

Removing the ECM breakout tape

Removing the ECM breakout tape
removing the black tape

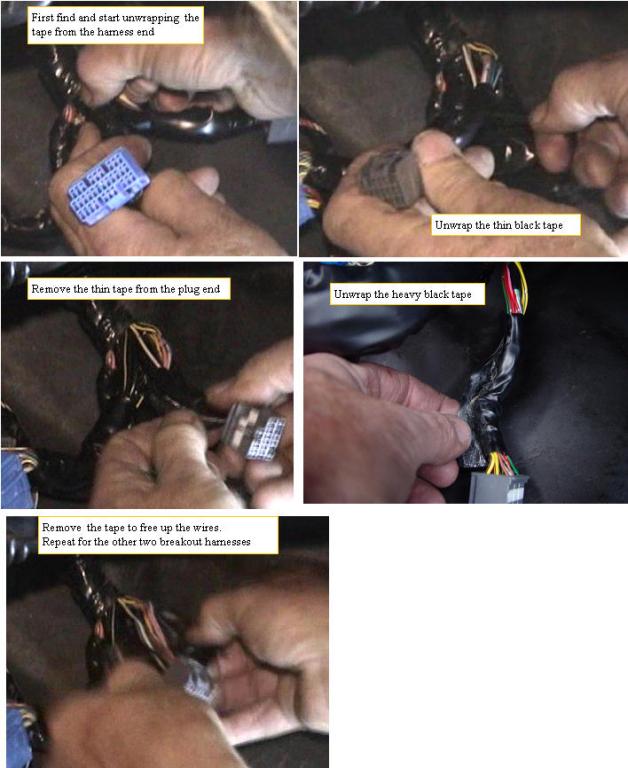
The three breakouts from the ECM harness are covered with standard black tape and some very heavy black tape. This makes the harness very inflexible, and if forced, could cause a wire to break internally which could be a big and difficult to find problem. The harness will be much easier to re form as required for unstressed installation with the ECM plug in adapter if the black covering is removed. This covering can be removed without sharp scissors or knifes if you patiently find where the last wrap of black tape is, and simply start unwrapping it from there. The plug end and the harness end of each covering is wrapped separately on some cars, and on others it is wrapped from the plug end all the way to the harness end, so look for the tape end on the harness end, and start unwrapping from there.
Once the three breakouts are unwrapped, the loose wires can be easily moved without stress.