Attaching the ECM plug in adapter
|
 | |
|
ECM with wires dressed ready for kick panel
|
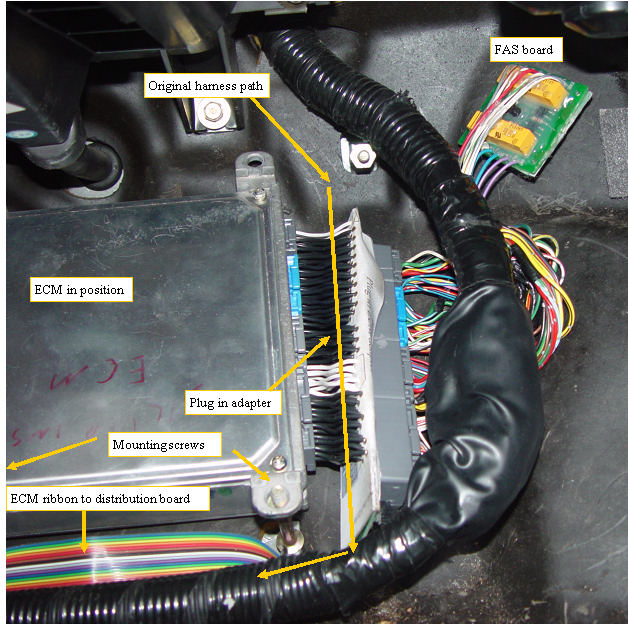
The ECM plug in adapter is first plugged into the ECM, then the 4 harness plugs are plugged into the plug in adapter. The main harness is lifted, and the ECM is placed on the two bottom mounting studs. The loose harness wires are gently redirected under the main body of the harness, and the main harness is pressed down on top. The main body of the harness is then routed to either the left or right side if the top right stud, depending on which side lets the harness sit with the minimal stress. Lift the harness and plug in the ECM to distribution board ribbon, and route it as shown in the video. This only should take a few minutes.
While removing this covering is exposing the harness wires, which would seem to make them more vulnerable, they are well protected by the black cover and the rubber coated floor pan.
If the FAS system is attached, the FAS will be passed under the main harness,as shown and located to the upper right of the ECM.
The ECM mounting screws that we had to take out from underneath, are not installed when we put the cover back on to allow cover install and removal without requiring movement of the ECM /plug in adapter and harness, since we have just routed them so nicely.
The cover is reattached using the four mounting nuts.
|
|
