The leather joystick
|
 | |
|
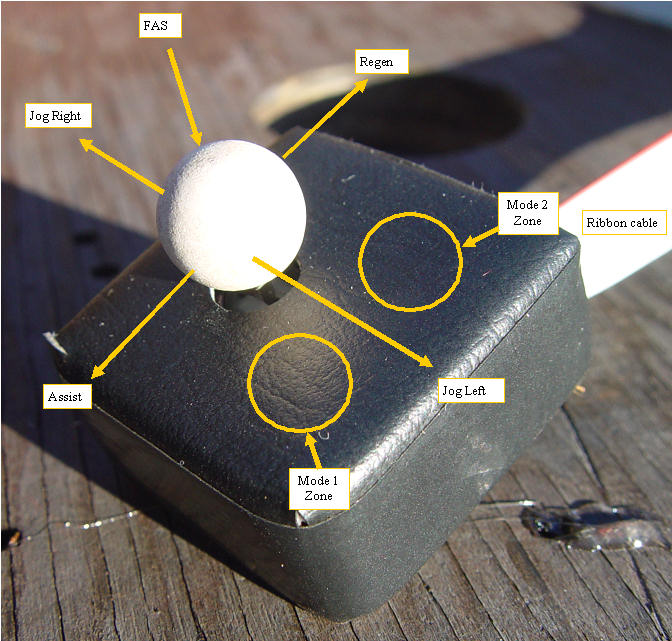
Leather joystick
|
The leather covered joystick has two hidden switches just below the leather surface. To activate them, one simply presses on the leather in the appropriate zones. This cover protects the circuits, keeps out dust, helps avoid false switch activation, and gives the joystick a more finished look.
|
|
