Mounting the shift knob joystick
|
 | |
|
Mounting to shift lever
|
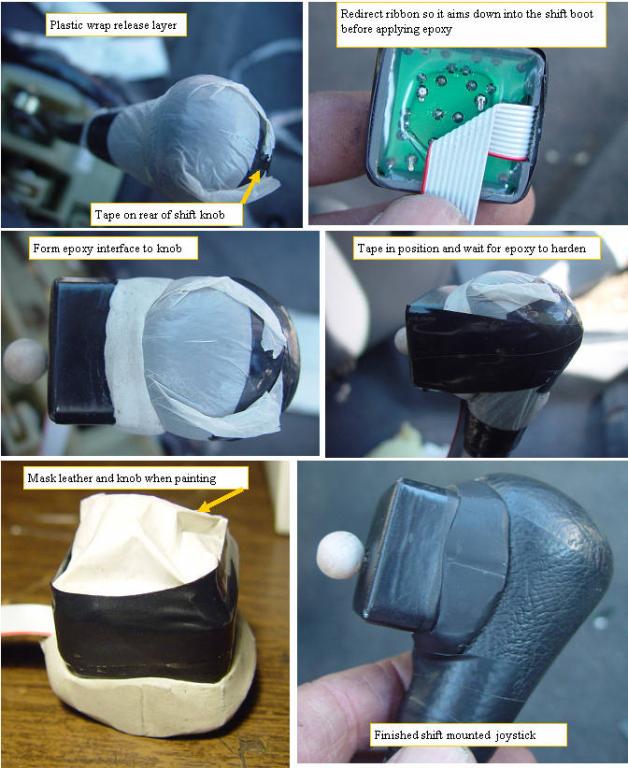
Another nice place for a joystick is on the shift knob. This position allows MIMA activation and control while your right hand is on the shift lever, for regen when downshifting, and assist when accelerating. The procedure is similar to the e-brake mount, and has the additional advantage that it can be mounted indoors once the shift knob is removed.
Cover knob with taped on plastic wrap,mix epoxy and place wad on joystick base.
Note: The e-brake mounted joystick will give assist and regen when moved in the same directions relative to the switch zones as the e-brake joystick.
When deciding which direction compared to the shift lever you would like assist and regen to activate, you may want to take a few days to play with different directions and positions for this joystick by taping the joystick onto the knob with black tape and no epoxy until you find just the right position and angle works best for you. The ribbon can be redirected to come out the bottom no mater which direction you chose.
After you determine the best position, again put a square of mixed epoxy putty under the joystick and form a smooth interface to the shift knob and tape while setting up.
After the epoxy has set up, do not mount the joystick to the shift knob yet, as we must route the wire through the shift boot.
|
|
