We will remove the cross brace behind the seats to gain better access for passing the DB-25 cable from the IMA box through the emergency brake console, under the rug, and into to the front shift console.
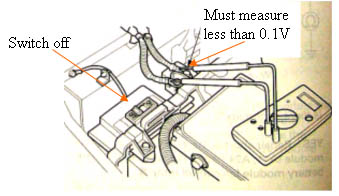
Make sure that the main HV switch is turned off Also make sure that the 12V battery in front, has been disconnected on the negative side.
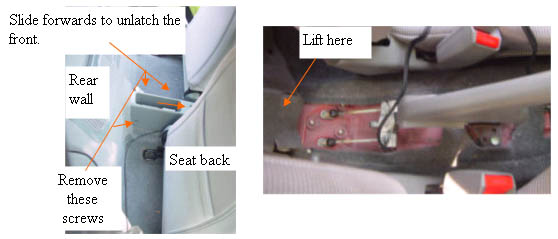
Remove the cover of the emergency brake. Once the e-brake cover is removed, lift the rear wall rug to expose the square hole in the rear wall.
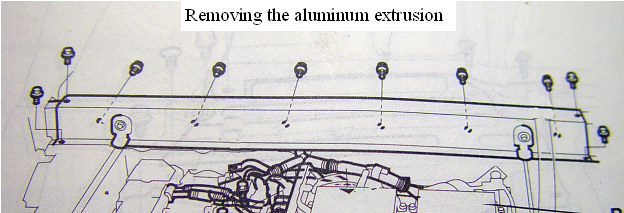
Removing the aluminum extrusion behind the seats
Gaining some access to the harness path
The harness must pass through a tight area behind the seats as it runs to the e-brake area. We will remove the large aluminum extrusion by removing the mounting screws under the carpet. The drawing shows the remaining screw locations.