You should have a big grin on your face after your test run. MIMA is fun.
Now we will confirm fan control wiring.
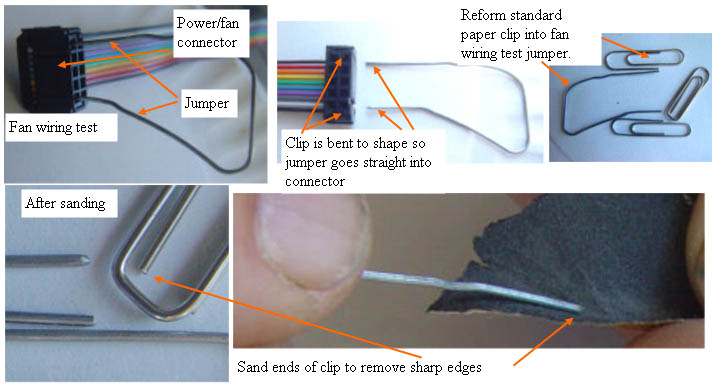
If your test drive of the car got the internal fans to run, you will have to wait and let things cool, as the MIMA fan controls work in parallel with the Insights internal control, and once the car decides to run the fan, we will not be able to turn them off. The first test is to confirm that the fans are connected correctly. Disconnect the fan connector for the following test. I did not provide a wire for this test, so I hope you have a small wire, about the diameter of the pins. A small paper clip works, so that's what I show here. Sand the leading edge of the clip so the sharp cutoff is removed, or damage to the plastic on the connector could happen. It must push into the connector female pin hole without binding or damaging the sides of the square plastic pin guide.
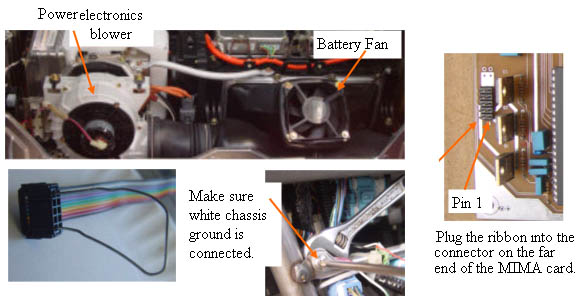
Fan Test With a cold engine and battery pack, start the car, idle in neutral with the e-brake on. Go in the back of the car, and confirm that no fans are running.
Put the modified paper clip into either of the two end pins. Both fan and blower should run at full speed. Test complete. Remove the jumper, and if you are a true environmentalist, re-bend it into the original paper clip shape, so you don't waste it.
Test complete, plug the fan connector back into the controller board, go to next step.