Remove all the torq and 10mm bolts from the rear covers.
|
 | |
|
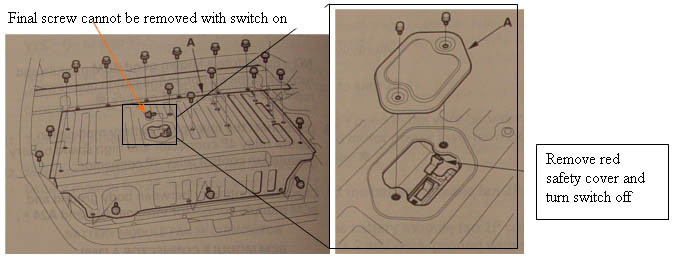
opening the IMA box
|
First open the metal cover in the center of the rear IMA area, and after pulling the red plastic cover off the switch, flip the switch to off, and replace the red cover to keep it off.
|
|
