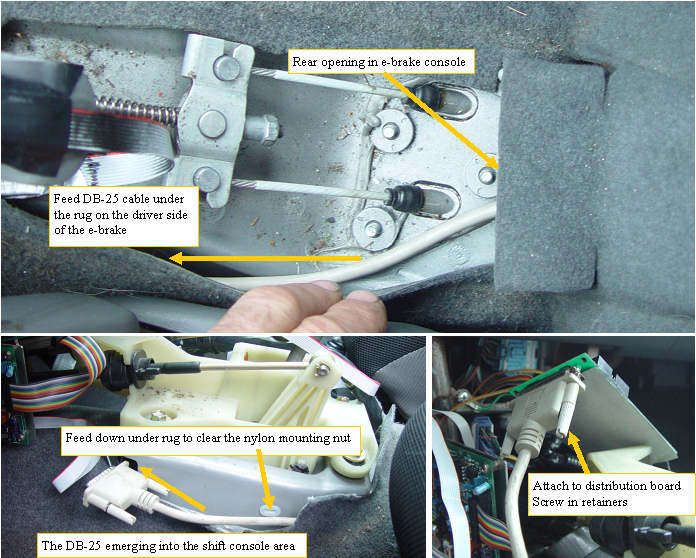
Running the DB-25 under the rug
|
 | |
|
Running the DB-25 to the distribution board
|
The DB-25 cable that we just ran from the back will be routed on the driver side of the e-brake, under the rug, and into the shift console. Be careful to route the body of the cable down into the rug where it first emerges, so it does not interfere with the shift console mounting screws. The connector is plugged into the distribution board, and the two thumb scret retainers are tightened to hold it in place. The distribution board is laid into the space between the shift mechanism and the front wire harness that is mounted to the shift console front upright tubes. The db-25 will sit right behind the MIMA mounting bracket.
|
|
