The end of the Plug and Play MIMA, and MIMA2
MIMA introduction
MIMA Operation
MIMA Users Page
Installing MIMA with The Plug and Play harness
Installation and introduction
1. Disassembly
Shift console removal
Remove rear storage compartment
Remove all the torq and 10mm bolts from the rear covers.
Continued...
Removing the IMA cover
The IMA box
Removing the battery and MPI foam
Removing the passenger seat
2. Gaining access to the opening behind the seats
3. Threading the DB-25 to the front
4. Installing the rear connections
5. Mounting the MIMA system in the car.
6. Accessing and connecting to the ECM
7. Installing the MIMA joysticks
8. Mounting the display
9. First powerup
10. The first MIMA operational test
Installing MIMA in a RHD Insight
FAQ
Installing MIMA with the pin replacement harness
software
The MIMA Joystick
The MIMA Display
The FAS system
DIY MIMA L
Cable impedance problem with last MIMA systems.
Learning to drive with MIMA
Hardwired Harness
Theory of Operation

Removing the IMA cover

Removing the IMA cover
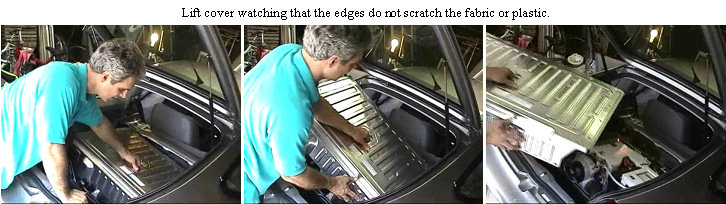
Dont scratch the fabric

Now that we have all of the screws and bolts out of the cover, and the power switch has been flipped off for a few minutes, we are ready to remove the cover and expose the wonders of the Insight IMA box.