The end of the Plug and Play MIMA, and MIMA2
MIMA introduction
MIMA Operation
MIMA Users Page
Installing MIMA with The Plug and Play harness
Installation and introduction
1. Disassembly
2. Gaining access to the opening behind the seats
Make sure that the main HV switch is turned off
Remove the cover of the emergency brake.
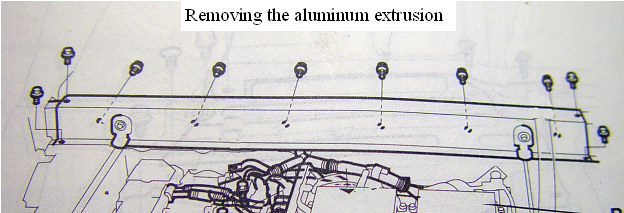
Removing the aluminum extrusion behind the seats
3. Threading the DB-25 to the front
4. Installing the rear connections
5. Mounting the MIMA system in the car.
6. Accessing and connecting to the ECM
7. Installing the MIMA joysticks
8. Mounting the display
9. First powerup
10. The first MIMA operational test
Installing MIMA in a RHD Insight
FAQ
Installing MIMA with the pin replacement harness
software
The MIMA Joystick
The MIMA Display
The FAS system
DIY MIMA L
Cable impedance problem with last MIMA systems.
Learning to drive with MIMA
Hardwired Harness
Theory of Operation

Removing the aluminum extrusion behind the seats

Removing the  aluminum extrusion behind the seats
Gaining some access to the harness path

The harness must pass through a tight area behind the seats as it runs to the e-brake area. We will remove the large aluminum extrusion by removing the mounting screws under the carpet. The drawing shows the remaining screw locations.