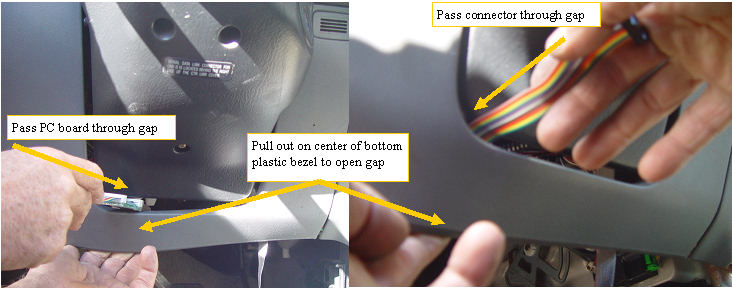
feeding the display PC board and connector through the bezel
|
 | |
|
feeding display wire through bezels
|
The bottom of the ribbon cable needs to be fed into the back of the dash. The dash material is quite flexible, and I have found that simply pulling out on the center of the bottom bezel will open up the gap so the display pc board and connector can be easily passed through.
|
|
