New England Hybrid Festival 2013
Mikes You Tube Videos
Mikes Saturday Hybrid-Solar- Electric Workshop
Insight 20 AH lithium battery system
assembling the pack core
BMS board mounting position?
Capturing the mounting boss positions
Cell tester is modified and lithium test fixture takes shape.
Charging experiments
Cleaning the cell tabs
fixing and deburring the heat spreaders
Final assembled pack core
Finishing the connection blocks
finishing the fins and end plates
First discharge graph
Getting started on the final design and build
Heat sink fins
heatsink vs no heatsink comparison
Higher thermal sensitivity look at the cell heating still shows no dents
Hot and cold cells compared.
How do the big guys do it
Insulators
Is using this asking for a problem?
main I/O terminals and Heat shrink
Making the 50 insulating strips
Painted cells to increase emissivity
Punching the holes in the tabs
Same discharge with huge heat sink on one side of cell
Testing the fans and layout of the BMS boards
The Battery case starts to take shape
The case is nearly finished
the connector plate is made and mounted
The tab punch
The world in IR Cool
Grid charger Users page
Mikes Surplus Loft
Renewable energy exhibits
New England Hybrid festival 2014

the connector plate is made and mounted

the connector plate is made and mounted
assembling the connector plate

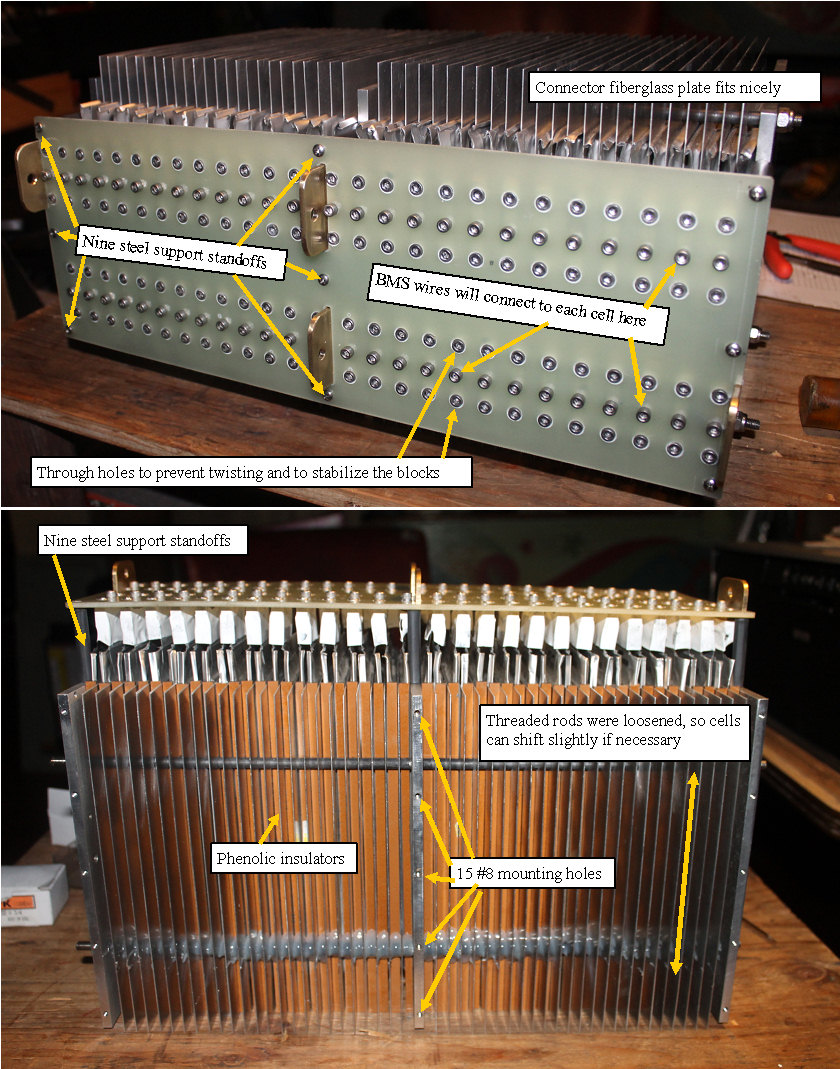
Probably the most critical part so far, this plate had to tie the pack together,and provide secure connection points for the BMS wires to each cell.
With anything like this where the cells were not uniform, I had to take the 3 dimensional stack of cells with connector blocks, and make an insulating plate that would line up with the connecter blocks and the 9 standoffs. I aproximated the positions of the blocks, and then adjusted the drawing to compensate for as built variations. I finally got the drawing where I wanted it, and machined the plate. I was happy when the plate fit nicely.
I loosened the threaded rods when the connector blocks were secured to allow the cells to shift the tiny amount that was required to get them all at the correct height and position.
Next step is to make the case, which will have to allow mounting of a standard relay assembly.