Cell tester is modified and lithium test fixture takes shape.
|
 | |
|
Getting set up for some testing
|
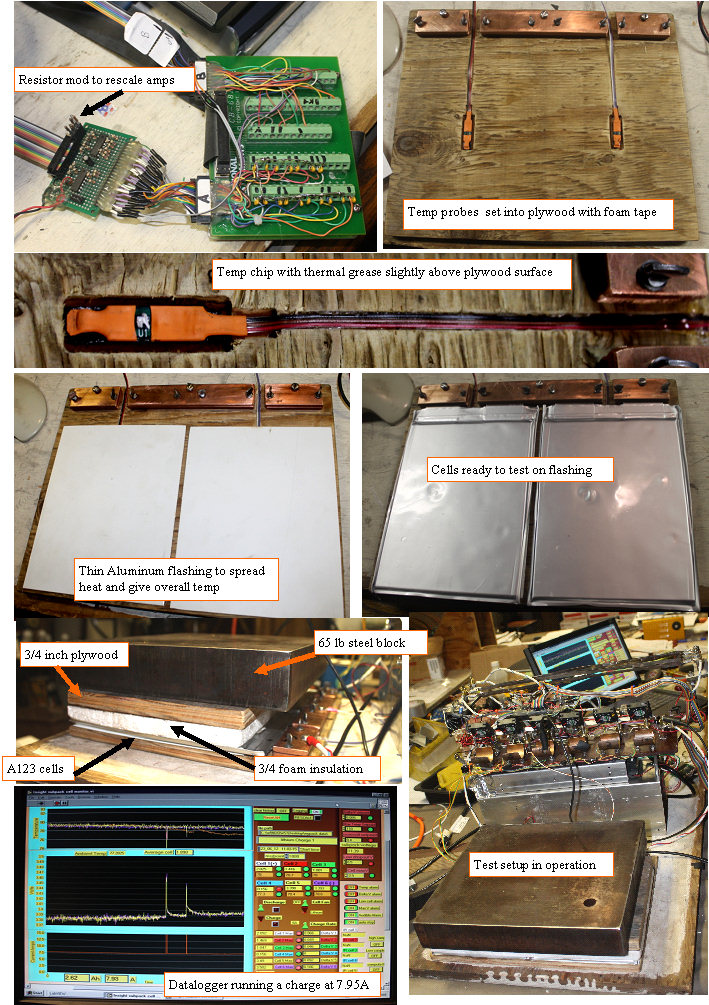
Got out the soldering iron, and made some modifications to the cell tester. Had to disable the other 4 cell channels,and have special calibration valuse for the lithium cells in the software.
Added max V charge stop in the test software.
had to add a header on the cel voltage amp where I can plug in some gain changing resistors, to rescale the amplifiers.
Set uo two temperature boards dead center on each cell, and mounted the board on some soft foam mounting tape, so it sits just a bit above the surface of the plywood, made two thin aluminum flashing rectangles for the cells to sit on, so the whole cell temp is better represented by the single temp probe. The cells need pressure on them to assure intimate contact between the plates and the electrolyte saturated spacers, and since the purpose of the test is to see the thermal characteristics of the cell, I opted to use a 3/4" foam/3/4" plywood pressure plate, with a 65 lb block of steel as a weight. This should allow us to first test the non cooled cell, and to clearly see any heating effect, as the aluminum plate will show the overall cell back side temperature. Once we see how the cells behave at 100A, and see any heating, we can try different cooling plate thicknesses on the top side and hopefully see the effect of active cooling in the bottom thermal monitoring zone, which should simulate the cell to cell juncture in a 2 cell stack.
At high charge currents, I see some temperature measurement errors, so I need to do a bit more work on the amplifiers.
In all it is already quite useful, and hopefully I can get us a discharge graph and AH measurement soon.
|
|