A better way to test a full pack on the stick based level
|
 | |
|
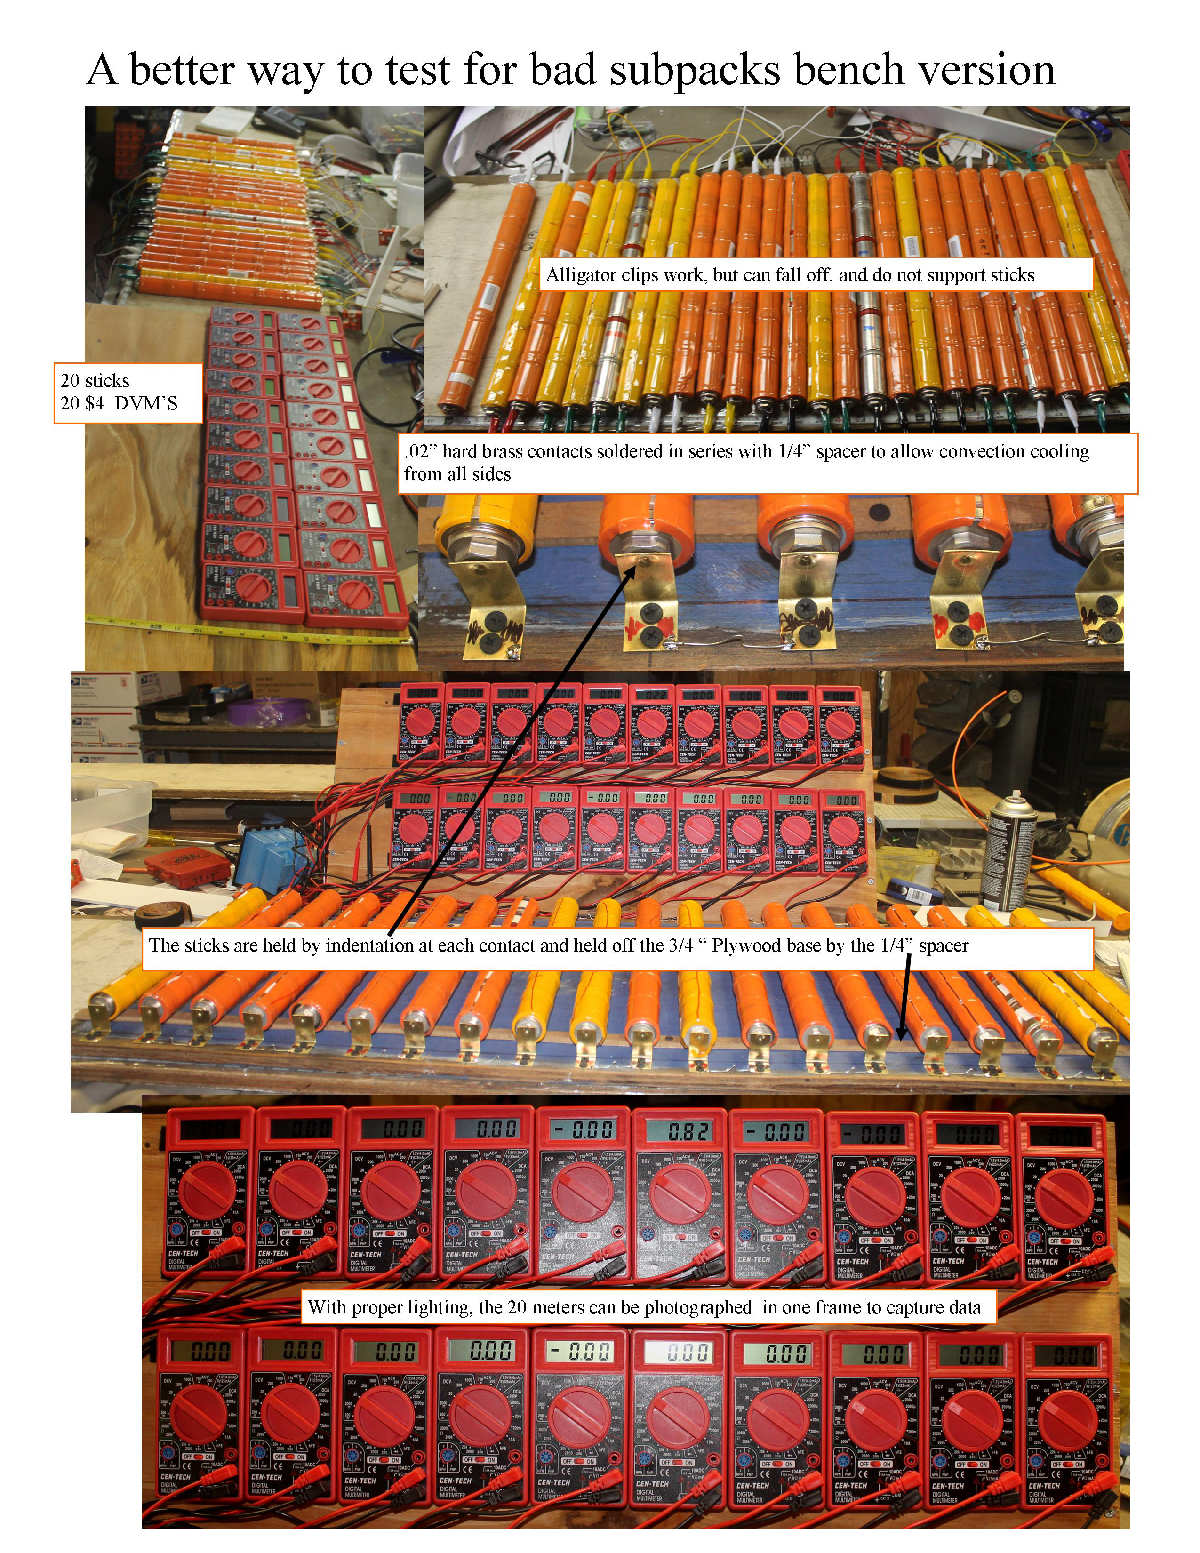
A better way to test the subpacks
|
I have a bunch of sticks that are some where between good and bad, and need a way to quickly sort them.
I will be developing a stick level monitoring system down the road, but wanted something that I could make and get operational quickly yet have good precision.
I started with 20 Harbor frieght DVM's which I was able to buy for $3.99 each. The DVM's are microcomntroller based, and have pretty good repeatability, and have a small calibration pot inside that allows matching the meters down to the 0.01V level.
I tested one of them, and saw that it draws 0.9MA from the included 9V battery, and the meter stays accurate until the 9v battery volts drops below where the low battery warning level display comes on.
I made a plywood back plate, and used velcro on the backing plate, and rear of the meters so they can be easily removed for calibrating and battery replacement.
To make the connections to the batteries, I sliced some hard brass .02" thick into 3/4" X 2" strips.
I ponched 2 mounting holes in ach and bent them into right angles.
I used a 1/4" rod that was rounded in a drill press to indent each contact point so it has a male protrusion to capture the 6MM screw hole on each end of the sticks.
To allow free air cooling, I put two 1/4" strips of wood across the base so it holds the sticks off the base for better cooling.
I soldered jumpers between the terminals to put all 20 sticks in series.
I will make an adapter so the same meters can be connected to a pack that has not been opened, so they can do double duty.
Cost $90 so far.
Seems to work well
|
|
