New consulting relationship with GreenTecAuto begins
What actually goes wrong with the batteries????
A look at todays Hybrid and EV battery packs
Battery packs exposed
Keeping Warm In New England
Plugging into the SUN
Making a small solar concentrator
Cutting the mirrors
cleaning up the dish
Single dish construction
multiple dish considerations
Making the tracker PC board
Making the furnace self powered
Building MIMA and the plug in adapters
Converting a telephone truck to electric
DIY dual pulse Capacitor Discharge Spotwelder
Chevy Bolt EV joins the family
Getting in shape while making electricity
Retirement
Replacing gasoline with solar electric lawn equipment
What is Genesis One?
How to stop the aging process DIY
MIMA Install Day 2005 a Big Success!
Building a hybrid car grid charger
Tapping into the Wind
Expanding MIMA with the Distribution board ( users projects )

Making the tracker PC board

Making the tracker PC board
Tracker board

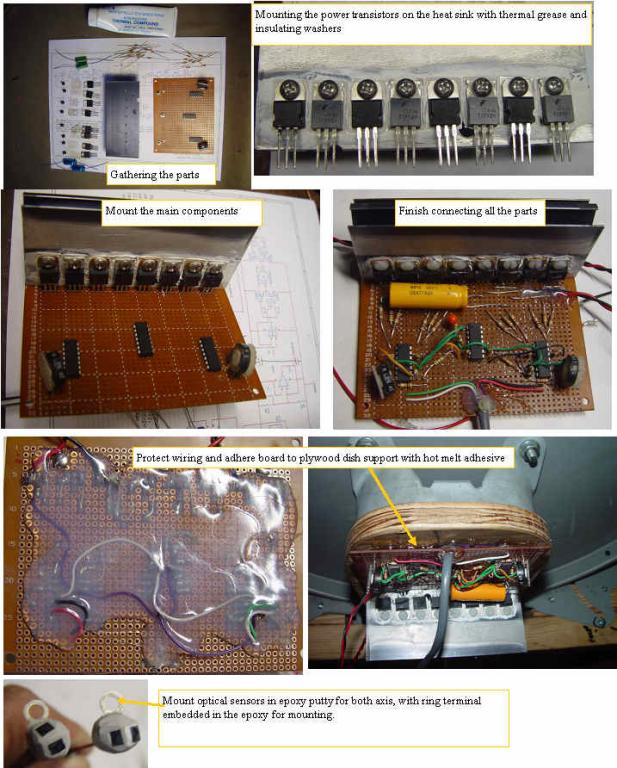
Gather the parts required for the tracker, and build the board. I used perf board with .1" on center hole grid.
The power transistors need to be mounted with insulating washers for the screws, and insulating pads between the heat sink and the transistor collectors.
The layout shown in the photo with roomy construction makes it easier to build. Once the board is built and tested, I glued it directly on the plywood support for the large dual satellite dishes. The opto sensors were soldered to the shielded cable at right angles, and then covered with epoxy putty, with an embedded ring terminal to act as a mounting system.
Simple Tracker schematic