Grid Charger
Grid charger owners and location, as well as some service links for hybrid services
Grid charger code V3.0 manual
Understanding the charging and balancing process
Pack discharger
SOC reset device
Insight Battery pack lifter
Grid charger test adapters
Reprogramming the charger
Installing the Genesis One Universal grid charger in an Insight
Installing the Genesis One Universal grid charger in a First Gen Civic
Harness options
The Universal Grid Charger
MIMA Pack Whack and rebalancing the battery
Mikes Insight
EV Insight with a Prius heart
Grid charger Operating Instructions V1.2
Designing a PHEV system for the Civics, Insight 1 and 2 ------------Micro V-Buck PHEV
Doug's V-Boost
Randall's Insight
Paul's Adventures in alternative evergy
Western Washington University X-Prize car
BlueBird1
Finding The Best Hybrid Mix
E-wheel for any vehicle

Mounting the temp and the Fan boards

Mounting the temp  and the Fan boards
Mounting the fan and temp boards

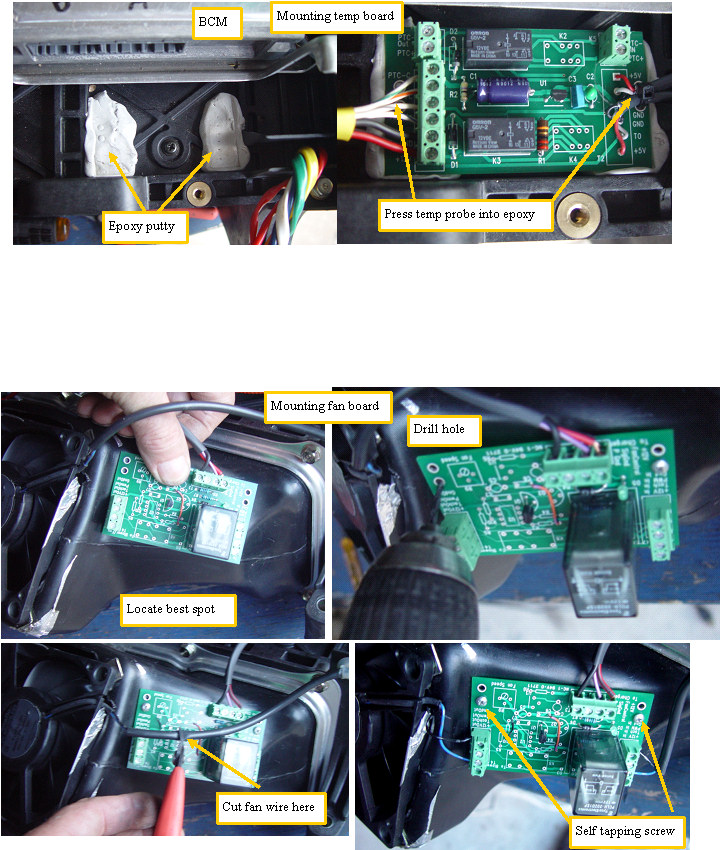
The fan board is screwed right on the side of the fan shroud. This board allows the charger to turn the fan on and off as required.

The pack is cleaned in the mounting area, so the epoxy sticks strongly.
The temp board is first coated with spray wax, then pressed down into the soft epoxy putty.
Waxed screws are threaded into the epoxy through the board mounting holes. When the epoxy is set, the board and screws can be removed from their form fit mounting pads.