The end of the Plug and Play MIMA, and MIMA2
MIMA introduction
MIMA Operation
MIMA Users Page
Installing MIMA with The Plug and Play harness
FAQ
Installing MIMA with the pin replacement harness
software
The MIMA Joystick
The MIMA Display
The FAS system
DIY MIMA L
Cable impedance problem with last MIMA systems.
Learning to drive with MIMA
Hardwired Harness
Level 1 Installation
2. Disassembly
3. Thread the Harness
4. Threading the Harness, Cont'
5. Opening the Harness
6. Level 1 Install (rear connections)
7. Fan Diodes Install
8. Battery Amp Monitor Rear Connections
9. Mounting the MIMA system in the car.
10. Level One wiring test.
11. Level 1 Check first power up
12. The first MIMA operational test
13. Testing the fan control wiring
14. Confirming temp probe and fan control operation
Placing the temp probes and fan diodes
Careful!
Remove the battery cooling fan
Thermal grease
Improve the fan
Complete...
Level 2 install
Theory of Operation

Complete...

Complete...
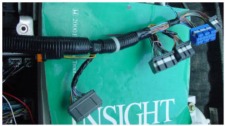
All test for level 1 install are now complete. Re assemble the rear harness, and make it look like this.
The battery temp probe wire should be zip tied to the existing fan power wire, so it cannot flop around. The harness zip ties should be clipped into the car chassis to support that harness as it originally was.

Put everything back together, install the rear electronics covers. Turn on the main switch, and put the storage insert and rugs back in , and level one is nearly complete